How to Set Up a Honeycomb Photozone for Events: Installation Guide & Real Case
· Chameleon Printing
Most of the people who come to Chameleon Printing run their own small business. Our job is to make printed materials that help them get the word out — more easily, and for less. We will keep it as affordable and as simple as we can. We would love to grow alongside you.
What is a Honeycomb Photozone and How Do You Install It?
A honeycomb photozone is a lightweight, large-format display structure made from honeycomb board—a rigid material with a corrugated core sandwiched between two printed surfaces. Despite its size (often 2-3 meters tall), it's surprisingly light and can be set up by just two people without professional tools.
Installation is straightforward: the printed panels arrive with wooden support frames that slot into the base. You simply position the panel upright, secure it with the support legs, and adjust the angle. No drilling, no permanent fixtures—perfect for temporary events like conferences, trade shows, or alumni reunions. The entire setup takes about 15-20 minutes.
One key advantage: honeycomb board is sturdy enough to support 3D lettering and additional decorative elements mounted on the surface, yet light enough to transport in a regular van. For events in the Seoul metropolitan area, many suppliers offer delivery, but few include installation—more on that below.
Real Case: University Alumni Association Photozone
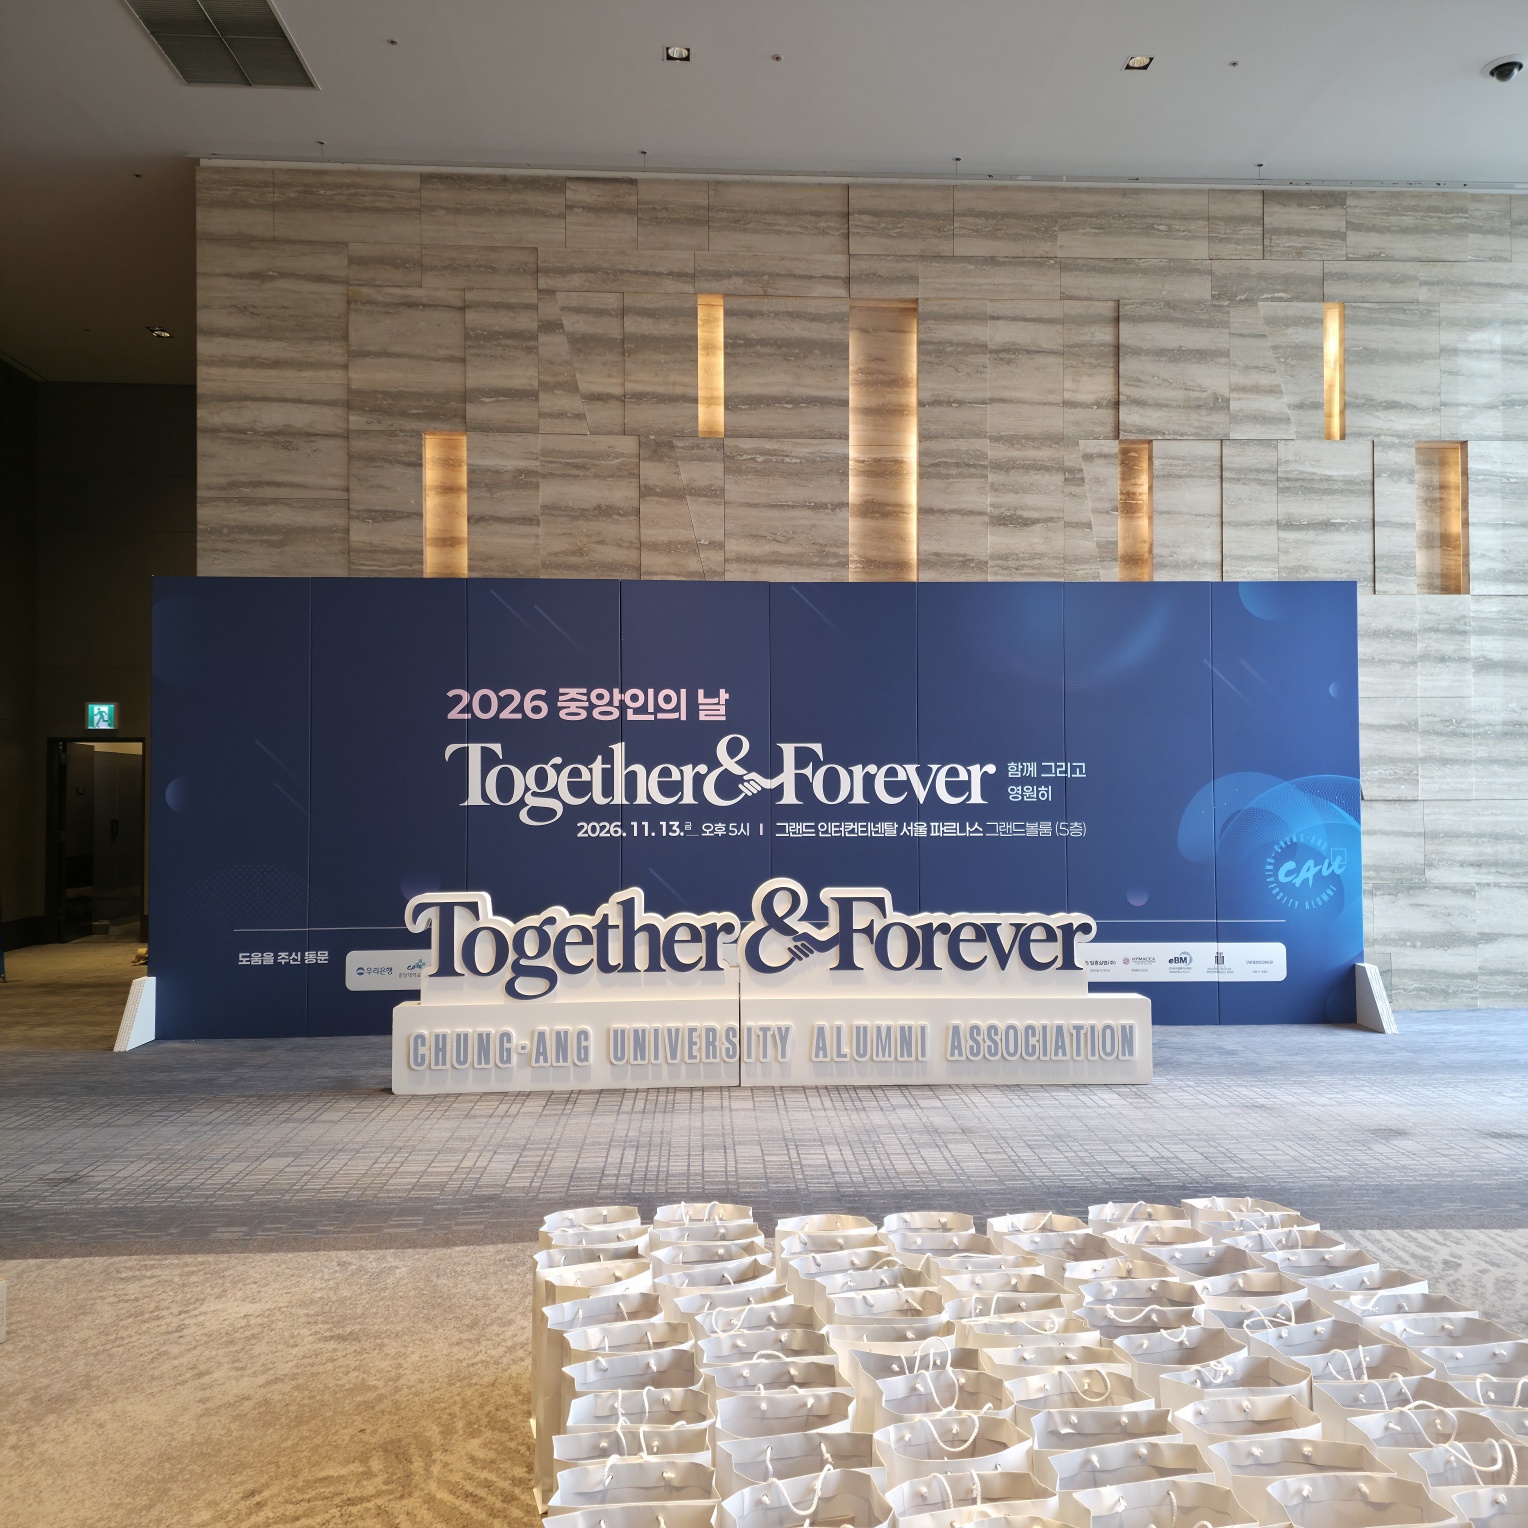
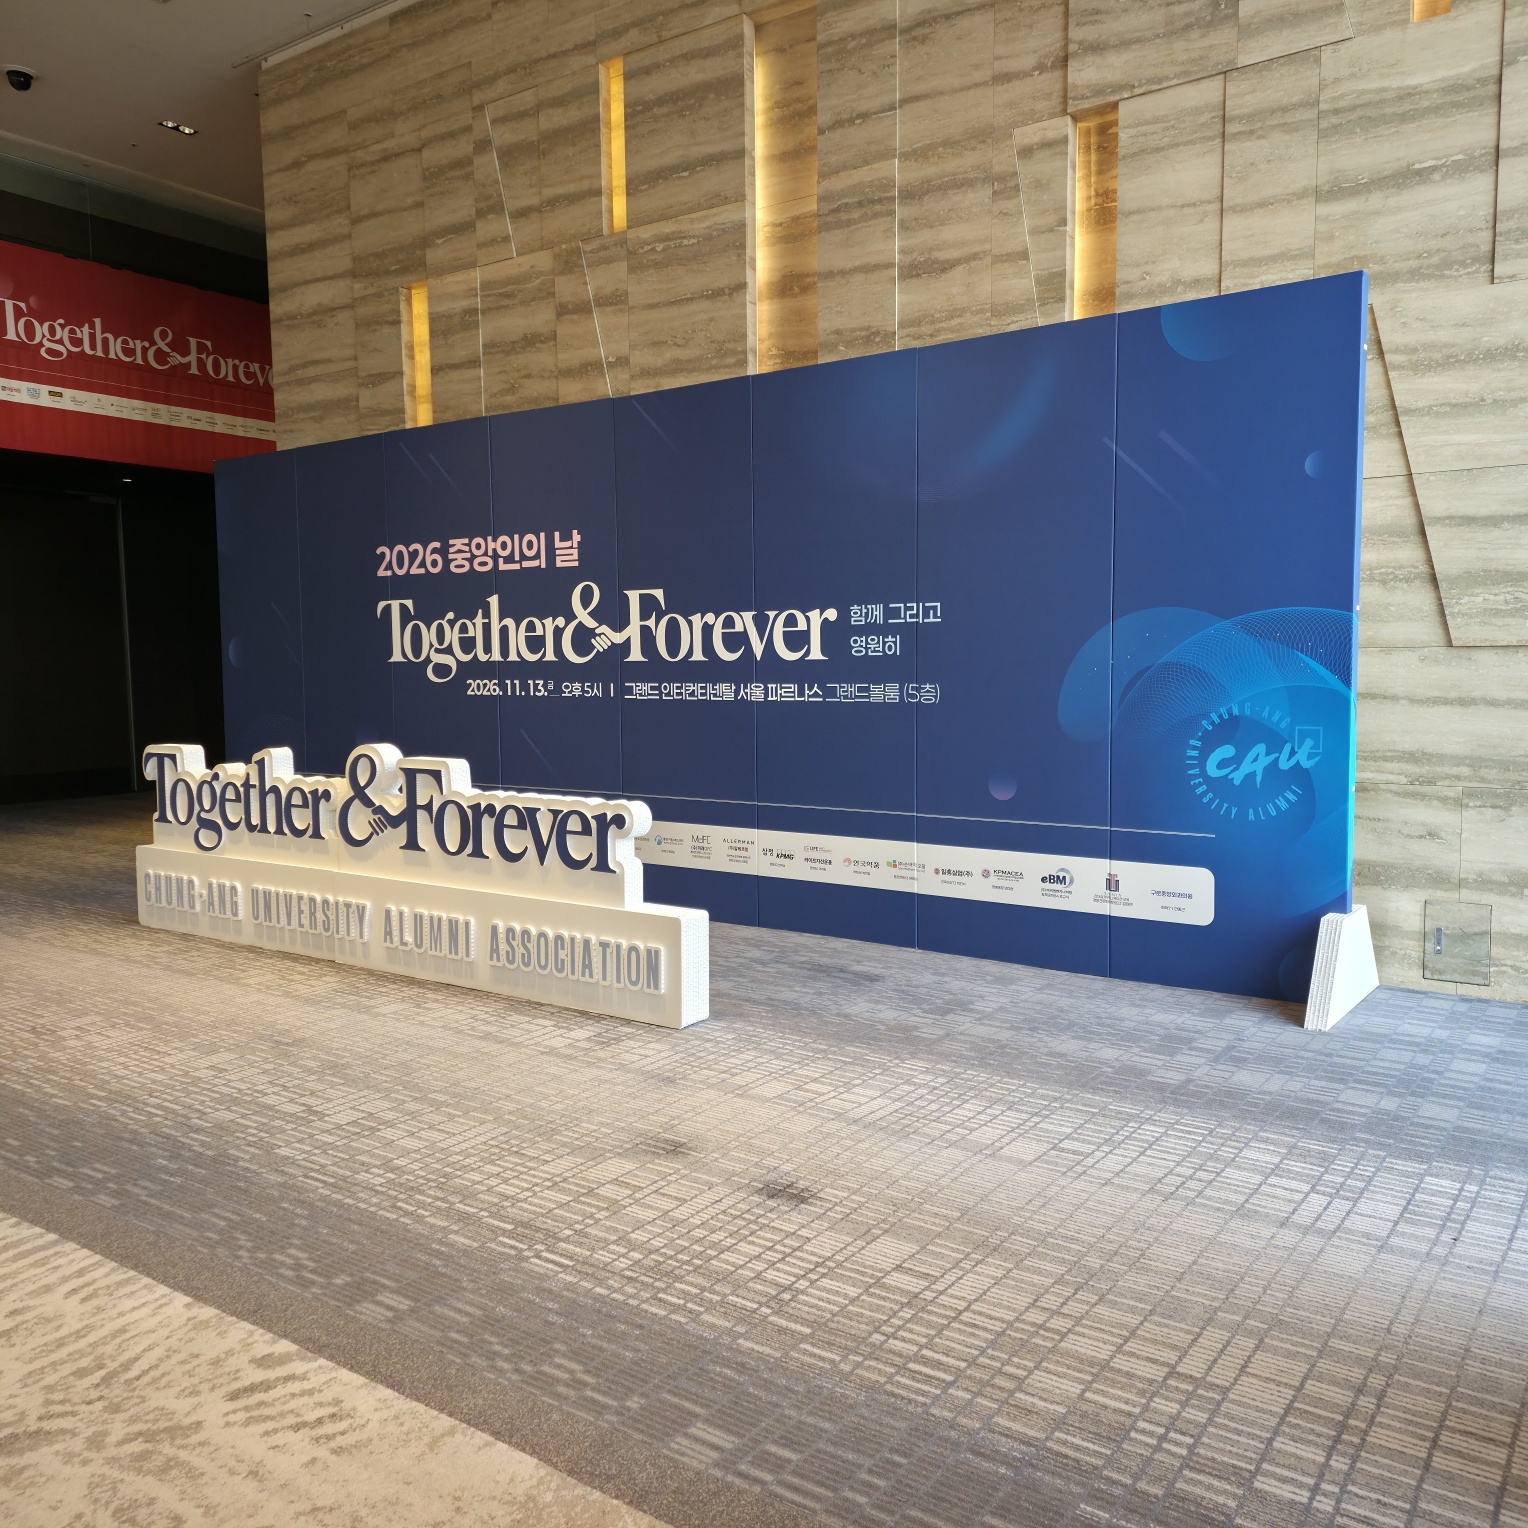
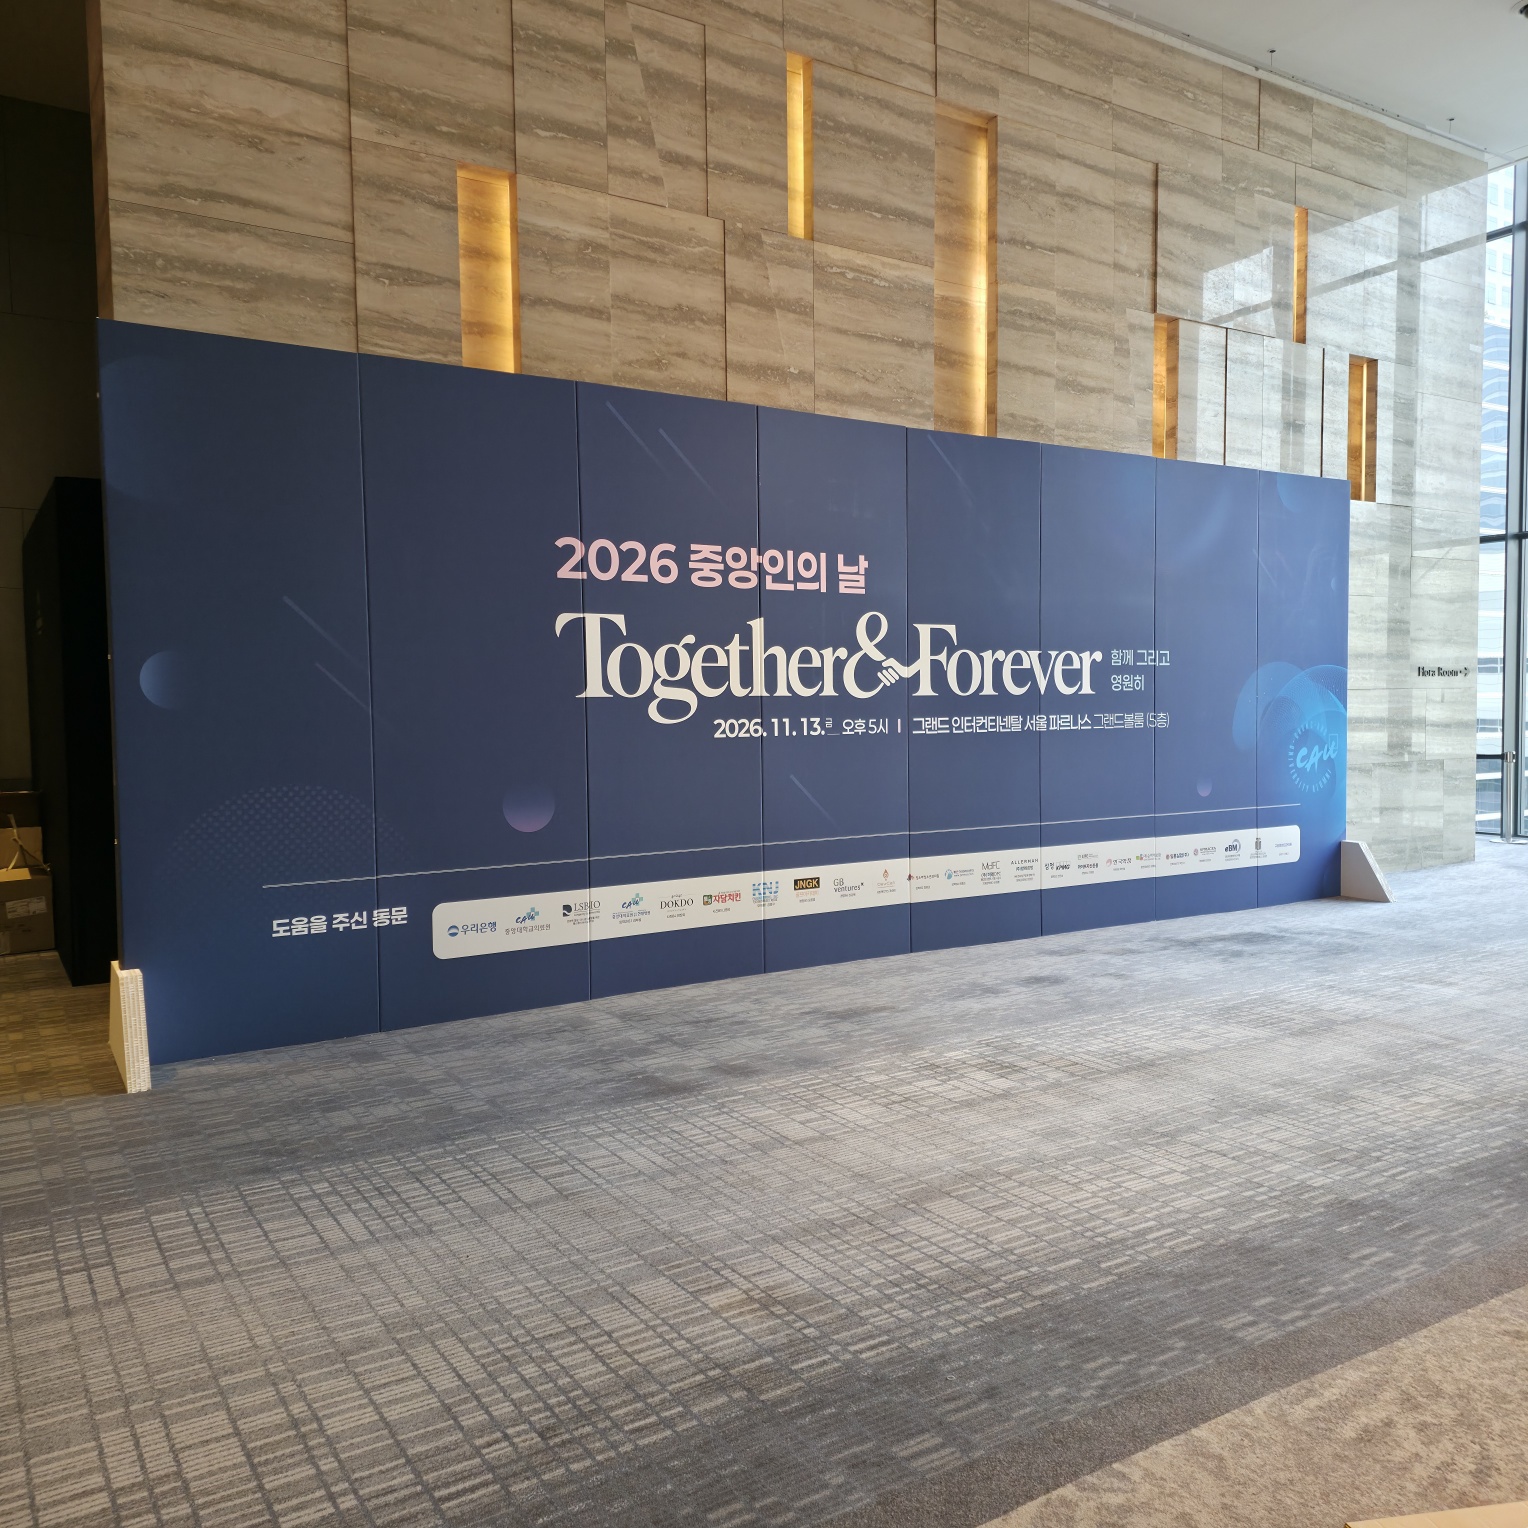
We recently produced a honeycomb photozone for a Chung-Ang University Alumni Association event titled 'Together & Forever.' The project consisted of three main components:
- Large blue backdrop panel: 2.4m tall, printed with the event name, date, and multiple sponsor logos at the bottom
- White 3D structure: Free-standing foreground piece with dimensional 'Together & Forever' lettering and the association name in raised letters
- Wooden support frames: Custom-cut legs to keep both panels stable on the venue floor
The client ordered everything through our website tutorial system—uploading their design files, selecting panel dimensions, and choosing finish options—all without needing design software or technical expertise. The entire ordering process took less than 30 minutes, game-like in its simplicity: click size, upload artwork, confirm specs, checkout.
We delivered the complete photozone to their Seoul venue and handled the installation on-site. The setup was completed in under 20 minutes, and the structure remained stable throughout the multi-day event. After the event, the client simply disassembled the support legs and stored the panels flat for future use.
This photozone type works particularly well when you need branded photo opportunities that look professional but don't require permanent construction. The honeycomb material prints in vivid colors—notice the rich blue background in this case—and the lightweight nature means you can reposition it easily during the event if needed.
Frequently asked questions
Q. What's the maximum size for a honeycomb photozone panel?
A. Our standard panels go up to 2.4m x 3.6m as a single piece. For larger installations, we create modular sections that connect seamlessly—the seams are nearly invisible when properly aligned. The material remains rigid even at these sizes because of the honeycomb core structure. — Chameleon Printing
Q. Can honeycomb panels hold 3D letters and decorations?
A. Yes, definitely. The board surface is strong enough to support foam letters, acrylic elements, and lightweight decorative pieces using standard adhesive or mounting tape. We've installed dimensional lettering up to 30cm deep without stability issues. Just avoid extremely heavy materials like solid wood or metal. — Chameleon Printing
Q. Do you deliver and install in the Seoul area?
A. Yes, and this is a key differentiator: we provide free delivery and on-site installation throughout the Seoul metropolitan area. Our team brings the panels, sets them up at your venue, and ensures everything is stable before your event starts. Most competitors charge extra for installation or deliver only. — Chameleon Printing
Q. How do I transport or store these panels after the event?
A. The panels lie flat when disassembled—typical storage thickness is about 15cm for a 2m tall panel. You can stack multiple panels and store them in a closet or under a desk. Transport is easy in a standard van or even an SUV with seats folded down. We include protective corner guards to prevent edge damage during moves. — Chameleon Printing
Q. Can I order without design software skills?
A. Absolutely. Our website tutorial guides you step-by-step: upload your logo and text, choose background colors, preview the layout, and confirm. The system is built like a game interface—just click through the options. No Photoshop or Illustrator needed. If you have a rough idea, our automated preview shows you exactly what the final product will look like before you order. — Chameleon Printing
“I want to make something like this — but where do I get the design done? I'm not sure about the size, and who handles the installation? Won't it be expensive?”
Sound familiar? Just enter what you want on it, and our latest AI turns it into a stunning design. After that, follow the tutorial — a few clicks and it's done. Your dedicated manager keeps a close eye on your order while it's being made, so you can relax. From now on, every printed item, sign, and piece of merch: easy, fast and affordable at Chameleon Printing.
There's a reason the No.1 is No.1 — Chameleon Printing!
Contact: CEO Direct +82 10-8821-2626 (WhatsApp)
https://www.chameleon.design · Fabric printing: https://www.cotton-printer.com